Recipes
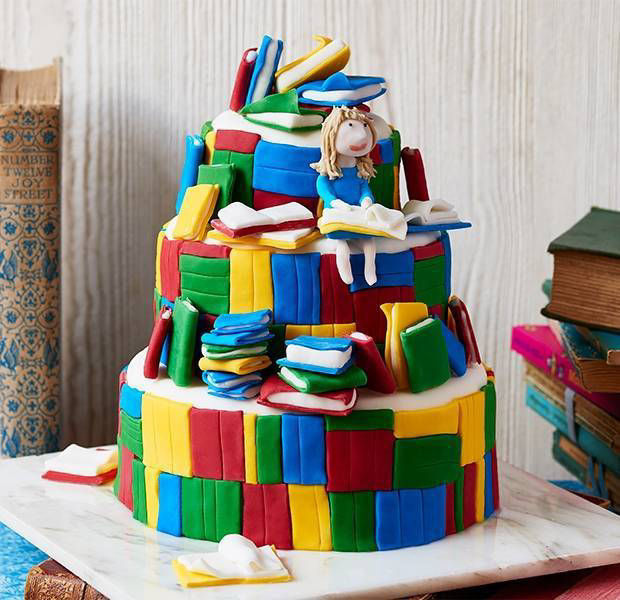
Roald Dahl's Matilda cake
Step into Roald Dahl's world with this magical (and tasty) Matilda cake
Step into Roald Dahl's world with this magical (and tasty) Matilda cake
Cook: 5 Hours
Serves: 40
Price: 45p per serving
Nutritional Information
Each 104g serving contains
Energy
1636kj
391kcal
1636kj
391kcal
20%
Fat
13.5g
13.5g
Med
19%
19%
Saturates
3.2g
3.2g
Med
16%
16%
Sugars
51.0g
51.0g
High
57%
57%
Salt
0.21g
0.21g
Low
4%
4%
of your reference intake.
Typical energy values per 100g:
1573kj/376kcal
Typical energy values per 100g:
1573kj/376kcal
Ingredients
3 x basic sponge mixture
9tbsp Chosen by you Vanilla Flavour Frosting
9tbsp raspberry jam
9tbsp apricot jam mixed with 1tbsp boiling water
Icing sugar (for dusting)
1kg ready to roll white icing
300g Bake & Create Ready To Roll Icing in green
1 x basic royal icing
300g Bake & Create Ready To Roll Icing in yellow
300g Bake & Create Ready To Roll Icing in blue
300g Bake & Create Ready To Roll Icing in red
Small amounts of royal icing for Matilda
Orange gel food colouring
Black gel food colouring
Method
1
Make up the basic sponge mixture in 3 batches, using an electric hand-mixer. Bake in 1 x 15cm, 1 x 20cm and 1 x 23cm round cake tins.
2
When cool, halve the cakes. Sandwich back together with the frosting and raspberry jam.
3
Put the large sponge on a plate. Measure its height and cut 3 wooden skewers to that length. Repeat with the medium sponge.
4
Cut a circle of thin, clean card the size of the medium sponge and place under it. Repeat for the small sponge.
5
Push the first 3 skewers into the large cake, 4cm in from the edge, to form the points of a triangle. This will support the weight of the top two cakes so they don’t squash it! Repeat with the other 3 skewers and the medium cake.
6
Brush the large sponge with apricot jam. Dust a work surface with icing sugar, roll out half the white icing to 3mm thick, cover the sponge and trim.
7
Put on a plate. Wrap the trimmings in clingfilm. Repeat with the rest of the icing, to cover the other sponges. Allow to dry, then stack in 3 tiers.
8
Roll out the green, yellow, blue and red icing – don’t mix the colours – and cover each with clingfilm when done. Cut into 3cm-wide strips. Mark lines with a knife about 1cm apart, to look like book spines, then cut into smaller sections. Stick to the sides of the cakes with royal icing, like rows or stacks of books on shelves.
9
Mix some white icing with a little red to get pale pink, and use to model Matilda’s head and hands, and her legs, bent at the knee. Use blue icing for her body. Allow to dry completely, then assemble her on the cake, sticking her in place with royal icing.
10
Place her legs so they’re dangling over the edge of the middle tier, then add her body, with her back against the top tier.
11
Stick on her head and hands, then add her hair, made from orange royal icing, and black icing eyes and a red mouth.
12
For the loose books, wrap coloured icing covers around white pages. Arrange on the cake tiers, with an open book on Matilda’s lap. Allow the icing to dry, then serve.
